
Each display has a number of times that it replaces images per second which is referred to as its refresh rate. This is measured in hertz (Hz). Considering the case of a 60Hz display, the refresh rate is 60Hz (60 times per second), and a 144Hz display has a refresh rate of 144 times per second.
Overclocking a monitor is when you set the rate higher than the one that the factory sets. An example is that a 60Hz panel may be operated at 75Hz, that is, it propagates the screen 15 additional times each second.
This generates a more fluid movement and a more reactive touch – particularly when playing a game or scrolling.
It is however worth knowing that overclocking does not directly increase the frame rate of your game or the speed of your graphics card. It just enables your display to render more frames per second in case your graphics card is capable of doing so.
Why Overclock a Monitor?
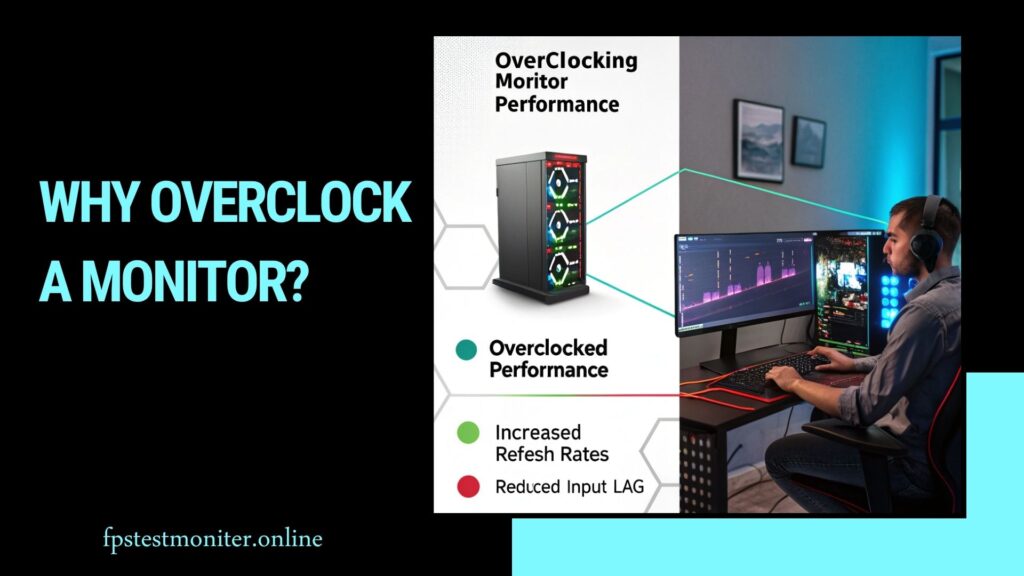
The main reason people overclock their monitor is to get a smoother experience without upgrading hardware. A higher refresh rate can make:
- Games feel more responsive and fluid
- Mouse movement appear cleaner and more precise
- Video playback smoother and easier on the eyes
Even small jumps from 60Hz to 75Hz are noticeable in motion-heavy scenes. For competitive gamers, it can be the difference between reacting slightly faster and missing a frame.
For non-gamers, smoother scrolling and reduced flicker can make everyday use more comfortable.
Is It Safe To Overclock a Monitor?
In most cases, yes — monitor overclocking is safe when done carefully. Modern monitors and GPUs are designed with built-in protections that prevent damaging voltage levels.
However, there are some risks and trade-offs:
- Display instability: You may see flickering, black screens, or frame skipping if your panel can’t handle the new rate.
- Slight heat increase: Overclocking may cause a minor rise in internal temperature, though rarely enough to harm the display.
- Reduced lifespan (minor): Running hardware beyond its rated specs can shorten life expectancy slightly, but the effect is often negligible.
The key is moderation — don’t jump from 60Hz to 90Hz immediately. Test gradual increases and stop if you notice any issues.
Before You Start: What You’ll Need
Here’s what you should have before overclocking your monitor:
- DisplayPort or HDMI 2.0+ cable: Older HDMI versions may not support high refresh rates.
- Compatible GPU: NVIDIA, AMD, or Intel graphics cards that allow custom resolutions.
- Your monitor’s specs: Note its native refresh rate and resolution.
- Basic knowledge of display settings: You’ll be adjusting these manually.
- A way to test results: Tools like TestUFO.com or Windows display settings will help verify the new rate.
Optional but useful: write down your current settings before you start, so you can easily revert if something goes wrong.
How To Overclock A Monitor
You can overclock your monitor using your graphics card’s control panel or a third-party tool. The process depends on whether you’re using NVIDIA, AMD, or Intel graphics.
1. Overclock with NVIDIA Control Panel
If you’re using an NVIDIA GPU, follow these steps:
- Right-click on your desktop and open NVIDIA Control Panel.
- Go to Display → Change resolution.
- Click Customize, then select Create Custom Resolution.
- Enter your monitor’s native resolution.
- Gradually increase the refresh rate (for example, from 60Hz to 65Hz).
- Click Test. If the screen stays stable, save the new rate.
- Increase slowly until the display flickers or becomes unstable, then roll back to the last stable number.
2. Overclock with AMD Radeon Settings
For AMD graphics cards:
- Open AMD Software: Adrenalin Edition.
- Click the Settings (gear) icon, then go to Display.
- Scroll to Custom Resolutions and select Create New.
- Enter your current resolution and slightly higher refresh rate.
- Apply and test the change.
- If stable, save it as your new refresh rate.
3. Overclock Using Intel Graphics Command Center
Intel users can also set custom resolutions:
- Open Intel Graphics Command Center.
- Go to Display → Custom Resolution.
- Set your display’s native resolution and increase the refresh rate.
- Apply and confirm the new setting.
4. Overclock Using Custom Resolution Utility (CRU)
Custom Resolution Utility (CRU) is a powerful tool that works across most GPUs.
- Download CRU from the developer’s website.
- Launch the program and look for your monitor under “Detailed Resolutions.”
- Click Add, and set your native resolution.
- Raise the refresh rate by small steps (e.g., +5Hz).
- Click OK, restart your PC, and test the display.
If your screen doesn’t show up properly, restart in Safe Mode and remove the new setting.
How To Test And Verify The New Refresh Rate

Once you’ve applied a higher refresh rate, it’s important to confirm it’s actually working.
Check In Windows
- Go to Settings → System → Display → Advanced display settings.
- Find Refresh rate (Hz) and make sure it matches your new setting.
Use Online Tools
- TestUFO.com: Helps detect frame skipping or motion artifacts.
- DisplayHZ.com: Confirms your monitor’s true refresh rate.
Watch For Visual Issues
Play a fast-paced game or move windows quickly. Look for flicker, tearing, or color shifts. If everything appears normal, the overclock is stable.
What To Do If It Fails
If your monitor shows a black screen or “Out of Range” message:
- Wait a few seconds — your system often reverts automatically.
- If not, restart in Safe Mode and reset display settings.
- Lower the refresh rate and test again.
You can always return to the default refresh rate if issues persist.
Related Articles
Is FreeSync Worth It?
A guide on FreeSync technology and if it’s the right choice for your setup.
Make Fortnite Faster on PC
Practical tips to boost FPS and smooth gameplay on your computer.
Best Refresh Rate for Gaming
Learn what refresh rate works best for competitive and casual gaming.
How Many Hz Can the Human Eye See?
Explore the science of vision and refresh rates for gaming displays.
Frame Rate vs Refresh Rate
Understand the difference and why both matter for smooth visuals.
How Much Does the CPU Affect FPS?
Learn how your CPU impacts frame rates and overall gaming performance.
Does Overclocking Improve Gaming Performance?
Overclocking doesn’t increase your frame rate (FPS) directly, but it improves motion clarity by allowing your monitor to display more frames per second.
For instance:
- At 60Hz, the screen updates 16.6 milliseconds per frame.
- At 75Hz, it updates every 13.3 milliseconds.
That slight difference can reduce motion blur and input lag — especially useful in competitive shooters, racing, or action games.
However, your graphics card still needs to produce enough frames to match the higher refresh rate. A 100Hz display is only effective if your GPU can render near 100fps.
Common Myths About Monitor Overclocking
Myth 1: Overclocking Will Always Damage Your Monitor
Not true. Modern monitors have internal safeguards. You’re only adjusting the signal your GPU sends, not increasing voltage.
Myth 2: Overclocking Boosts FPS
It doesn’t. FPS depends on your GPU. Overclocking only affects how many frames the display can show per second.
Myth 3: Every Monitor Can Be Overclocked
Some panels can handle it, some can’t. IPS panels typically overclock less than TN or VA types.
Tips For A Smooth Overclocking Experience
- Increase refresh rate in small steps (5Hz increments).
- Use DisplayPort for high-resolution, high-refresh setups.
- Always test stability after each change.
- Keep a record of your last stable settings.
- Avoid pushing limits — sometimes a modest gain (like 10–15Hz) makes a big difference.
Final Thoughts
One of the simplest methods of increasing the system experience and performance without changing hardware is overclocking your monitor. When applied properly, it increases fluidity, reaction speed, and display quality — particularly in gaming.
It is all a matter of patience and trial. Keep it slow, check your results, and find the maximum stable refresh rate of your display. Even a small increase can help in having a better experience.
It is not about reaching the upper scores — it is about finding the golden mean between performance and stability.
Frequently Asked Questions (FAQs)
Q1. Can I overclock any monitor?
Not all monitors support overclocking. Many modern gaming monitors allow small increases, while budget or office displays may not.
Q2. How much can I safely overclock my monitor?
Most monitors can safely handle a 5–15Hz increase. Anything beyond that may cause instability or artifacts.
Q3. Will overclocking void my warranty?
Usually, no. Overclocking through GPU software doesn’t alter monitor firmware. But check your manufacturer’s warranty terms to be sure.
Q4. What cables are best for overclocking?
DisplayPort 1.2+ and HDMI 2.0+ cables handle higher bandwidths and are best for stable performance at higher refresh rates.
Q5. Can laptops be overclocked the same way?
Laptop displays can sometimes be overclocked, but results vary widely depending on the panel and driver support. Proceed with caution.
Q6. What signs mean my overclock failed?
Look for flickering, blank screens, frame skipping, or distorted colors. If you see these, lower your refresh rate immediately.
Q7. Will overclocking reduce input lag?
Yes, slightly. Higher refresh rates mean the screen updates more frequently, reducing the time between your input and what appears on screen.
Q8. Should I overclock a 144Hz monitor?
You can, but the gains are often minimal. Going from 144Hz to 155Hz isn’t as noticeable as from 60Hz to 75Hz.